Replacing an FM Towns II CMOS Battery

This isn’t something I was originally planning to write about but after all the recent posts on fixing up the FM Towns I thought I may as well finish the story off. I’ve found so little information when Googling, I’ll try to spare someone else the trial and error I’ve gone through.

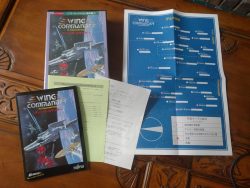
At any rate, shortly after finishing a long awaited playthrough of Wing Commander, I decided it was about time to sort out the dead CMOS battery on my FM Towns II UR. I had no idea where the battery was located or how to take the machine apart which is where this guide comes in. Most of these photos were more for my reference than anything else and not with this purpose in mind so bear with the quality.

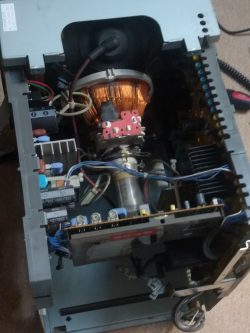
Taking the back of the case off is easy enough. Just undo the 4 screws + remove the memory slot flap and the back of the case will slide straight off. This just presents you with a second inner case of steel panels, the top of which needs to be removed by undoing the many, many screws holding it in place.

IMG_20170702_153211s

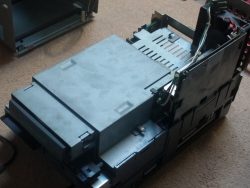
That will expose the built in monitor and the various boards surrounding it. Hopefully this goes without saying but CRT screens act like giant capacitors and are more than capable of giving out lethal electric shocks. You either want to discharge the tube or be extremely careful not to touch it. The good news is that you don’t need to go near this part of the system much so the latter should be fine. The computer part of the unit is on a separate caddy that can be slid out of the back once unscrewed.

IMG_20170702_153232sIMG_20170702_152931s

Before sliding this out, you will need to unplug the monitor cable at the front left, the speaker cable at the front right, a connector cable at the back right and another at the top left of the case (the grey three pin plug in the photo above). It should be obvious which cables once you start sliding the unit out.

IMG_20170702_153945s

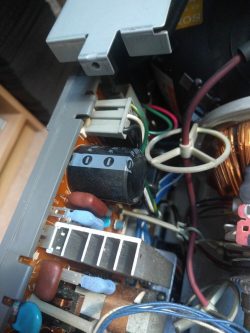
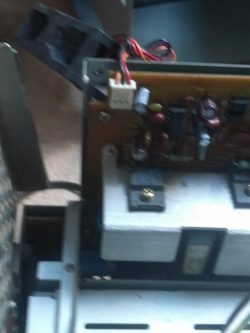
Having got this far, you need to remove the fan at the back of the case so that you can then remove the board it is attached to. You can unscrew the fan through the metal grill. There is nothing attached to the circuit board at the bottom, it just needs unplugging, unscrewing and lifting out.

IMG_20170702_154612s

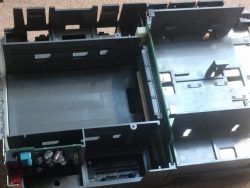
Since I had no idea where the CMOS battery was, I continued stripping parts after this. A lot of these clip into place on the plastic frame so you simply have to pry the plastic clips open to release. It’s quite a neat design but doesn’t exactly give easy access to the motherboard since it’s at the bottom.

IMG_20170702_155024s

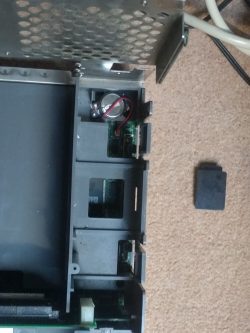
I was expecting the CMOS battery to be attached to the motherboard and that I would need to strip everything right down to that level. As it happens, I could have stopped earlier. Just below where the fan was is a little space with a black plastic tab over the top. The CMOS battery is hiding just underneath the tab. It’s attached to the motherboard via a plug and short wires so you can easily remove it.

IMG_20170702_161021s

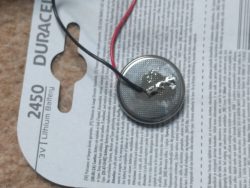
The metal plates at the ends of the wires are firmly attached to the old battery. I pried these off as far as they would go, snipped off the remainder and soldered what was left to a new battery. Soldering to batteries isn’t exactly the best of ideas but it does the job. It’s a CR2450 battery you need if you want an exact replacement. I wrapped this up in tape and started the rebuild.

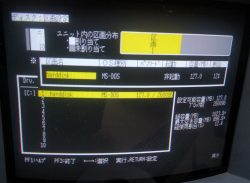
Once I had the machine back in one piece, I endured a lot more messing around before I was sure my fix had worked. I’ve been using Towns OS to set up my hard drive each time I started the PC. I still found the settings weren’t being saved if I powered off. The clock on the other hand was now keeping time so I knew my battery was working. I had the idea that maybe there was a second battery in the unit for a while but it turns out that all I needed was to use a DOS boot disk, with the setup2 program (as described in a previous post) to set up the hard disk. This then saved the CMOS settings correctly.

Installing Towns OS is nice and easy. There is a utils folder on the towns CD with an install program (it’s the icon with HD and an arrow). I did find out that this wiped my hard disk after I’d done it. Not a big deal but I won’t be importing my Wing Commander pilot into Secret Missions as a result. I had been planning on doing a video showing the last mission but I’ll do the last mission of Secret Missions II instead (when I make it that far).

Installing Wing Commander FM Towns

All my recent posts have been dealing with getting an FM Towns II computer in a suitable state to play Wing Commander. In the last of these I took a quick look at the analog controller I’ll be using and prior to that managed to upgrade the RAM from 2 to 10Mb. This time I’m dealing with the matter of getting a hard disk drive up and running.

Near enough all FM Towns computers include a SCSI interface for connecting up external SCSI drives and mine is no different having a SCSI-1 50 pin centronics connector on the back for this purpose. SCSI connectors have come in many shapes and sizes over the years but there are cables to convert between these and in theory it’s all backwards compatible. As such, my first thought was to find the cheapest SCSI hard drive I could with an appropriate cable to connect it up and go from there. With that in mind I bought this:-

IMG_20170625_153711

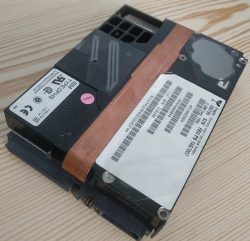
This is a 2Gb IBM drive pulled from a laptop. It’s a SCSI-3 device with a 68 pin half pitch connection on the back. I found plenty of manuals on the web and tried various jumper settings on the hard drive (of which it has many) but was unable to get anywhere at all with it. Initially I was trying to set the drive up using a Towns 2.1 OS boot disk that came with the machine but found another guide on hard disk installation at http://illusioncity.net/guidefm-towns-how-to-create-and-format-an-hd-image-and-install-dos-with-cd-support/ .

The snag with this guide is that I needed to create a DOS boot disk and the Towns doesn’t even use a standard 1.44Mb format. I’ve managed to source a complete download of near enough everything released for the FM Towns (not one I can share unfortunately) which included the DOS disk images. To write a disk I had to connect up a 3.5 inch floppy drive to my modern PC and used a program called Omniflop. 1.44Mb floppies appear to work fine for this purpose. Omniflop is an old program but works perfectly in Windows 10 at least at the time of writing. It’s a simple enough process – just follow the instructions at http://fullmotionvideo.free.fr/phpBB3/viewtopic.php?f=5&t=1187.

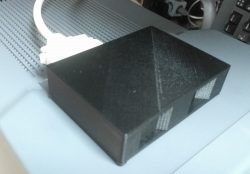
The working boot disk didn’t actually help out as I still couldn’t detect the hard disk from the setup program. I clearly needed another plan so searched the web and came across the SCSI2SD device. This is one of those fantastic modern gadgets that makes retro computing so much less grief than it would have been a few years back. It emulates up to 4 SCSI devices at once including hard drives, CD-ROM and floppies, storing all the data on a swappable micro sd card. I ordered mine from Amigakit where it’s currently listed as SCSI to Micro SD Interface Adapter. I was slightly wary about this as there is a long list of supported devices on the Wiki which doesn’t include the FM Towns but it seemed the best shot.

IMG_20170625_153812

I also ordered a case for the device from Ebay. These are 3D printed and include the cabling on the inside to connect to the board. This one has a 50 pin half pitch connector on the back. I can’t honestly say I’m too impressed with the quality of the case but it does the job. Just don’t expect to be able to get the SD card out without tweezers. You don’t want to take this thing apart too much either as the screws had barely any purchase on the first assembly.

SCSI2SD

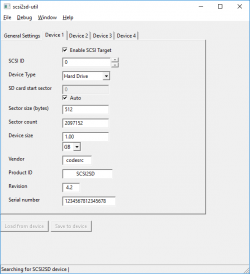
Setting up the SCSI2SD is a matter of sticking in an SD card, connecting it to your PC with a USB cable, running the utility software and selecting a drive size. I set up a 1Gb drive but found out afterwards that Towns DOS won’t take partitions over 127Mb. You can set up multiple partitions on one large drive if you wish and there are different file table formats that you may be able to use if you know what you are doing. I stuck with MS-DOS since I know it will work.

IMG_20170625_154008

There is no fdisk to partition hard drives on the towns and the system has a more all-encompassing setup program instead. The illusioncity guide linked above details what you need to do, although you can do the same job in Towns OS 2.1 by the looks of it. I’m glad to say that the Towns detected the SCSI2SD without any problems whatsoever and I was soon up and running. The power is drawn directly from the SCSI connection so there is no need for any power source other than the Towns itself.

That just leaves the matter of actually installing Wing Commander. I would like to think there would have been an installation program but the extra instruction sheet bundled in with the game says to manually copy all the files to your hard disk from the CD. This proved more tricky than it sounds since I’m dealing with an unfamiliar operating system in a foreign language. My first thought was to use DOS since the commands are the same. This appeared to be going OK until I noticed how just many different subdirectories I was going to have to copy one by one (there is no xcopy command on my DOS disk).

IMG_20170625_155610

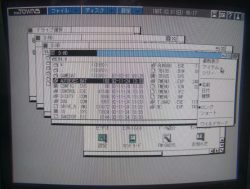
I swapped to Towns OS at this point. The file browser on this defaults to just showing some icons to run programs rather than the actual file structure. After randomly trying options, I realised that you can swap to showing the files by clicking the double folder icon at the top right of the window and selecting the second option down. After this point it’s a case of drag and drop. Wing Commander can then be started by running wc.exp and apparently defaults to English which is just as well.

It’s been a longer journey than I anticipated getting to this point but I’m there at last. I highly recommend Google Translate for anyone messing around with one of these machines that doesn’t have much Japanese. My phone struggles at times to pick up the screen clearly but it’s meant I’ve been able to decipher the menus in Towns OS and work out all the basics.

I do still have to set up the hard disk every time I start the machine since I need to replace the BIOS battery. This would be no small task in one of these things and would mean complete disassembly of the machine and probably soldering the new battery in place. I’ll leave that job for another time (if ever). For now, it’s about time I played some Wing Commander.

Sharp Cyberstick

My quest to get an FM Towns set up continues. I’ve certainly learnt a bit but still had no success with my first attempts with an external hard drive so am going to try a SCSI2SD device next. More on that when it arrives and if I actually get it working.

In the meanwhile, I have received one more relevant bit of kit which I’ll take a quick look at here:-

IMG_20170620_190732

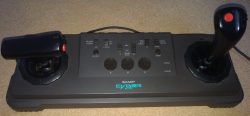
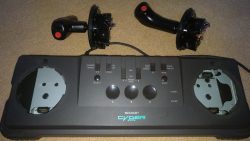
This is a Sharp Cyberstick controller and is about the only option for an analog joystick on the FM Towns as far as I’m aware. There are some more conventional analog gamepad controllers but it has to be a joystick for Wing Commander.  The Cyberstick is also supported on the X68000 (should I ever happen to get one) and apparently on a handful of Mega Drive / Mega CD titles. Those Mega Drive titles don’t include Wing Commander I’m sorry to say.

IMG_20170620_190814

It’s a fairly high end device with a good deal of customization options available. The most striking of these is the ability to remove the stick and throttle and swap their positions around. A little side benefit of this is that all the working parts of the analog controller can be easily exposed and serviced should it be required.

IMG_20170620_190953

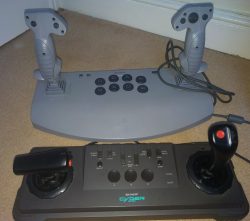
The unit is quite large but not as large as I might expect. Comparing it here to the Sony dual analog controller, there is a marked contrast in size and I would prefer the joystick especially to have been considerably bigger. I suppose this was aimed squarely at the Japanese market who presumably have slightly smaller hands on average. As for myself, I’m left holding on with my fingertips. The resistance on the stick is extremely low so it’s still very controllable like this.

The throttle on the left isn’t a true throttle as it returns to the center position when released. When using it in Wing Commander, it essentially acts as a switch to raise and lower speed. A true throttle would have been far more satisfying but limited the controller in other games no doubt. A switch to turn the centering off/on could have cured this but no such luck.

I’ve not played a lot of Wing Commander with the Cyberstick as of yet as I’m waiting until I get a hard drive. My main complaint would be that the controls don’t appear to be re-definable and while there are nice touches like being able to use the little toggle switch on the throttle to lock/cycle targets, the D button on the throttle only duplicates the B button on the joystick to fire missiles. This means that to use the afterburner, I have to let go of the throttle entirely to reach over for the C button in the middle. It works but surely didn’t need to be this clunky.

Truth be told, I’m a little disappointed with this controller. It’s like Sharp set out to make a flight controller and then thought it had better work with other types of games and compromised. The main body of the unit is large and heavy yet the two sticks themselves where you will have your hands 99% of the time are lightweight and a bit cheap. It comes across as a bit of a toy when compared to the Thrustmaster’s and the like that were on the PC’s of that era. As such, I’d rate this behind the Sony dual analog and especially the 3DO CH flightstick when it comes to the options for playing Wing Commander games on consoles. Neither of those systems had the original Wing Commander 1 & 2 though and this is definitely preferable to using a gamepad and/or keyboard. It’s an essential extra if you want to play Wing Commander on a real FM Towns but you’d better be more than a little fanatical about such things to make it worthwhile, or have really, really small hands.

FM Towns Memory Upgrade

I’m still trying to get my FM Towns in a state to play Wing Commander. It might help if I hadn’t spent so much time playing Truxton 2 on it but I have made some progress this weekend. The main problem I’m having is the lack of information and what there is often conflicting. As such, I thought I’d share what knowledge I do gain starting today with the memory upgrade.

My FM Towns II (like most of the models) comes with 2Mb of RAM. This was quite a lot for the time but that single speed CD-ROM drive just isn’t up to loading data on the fly (as shown in the fairly painful first attempt with Wing Commander a couple of weeks back). I gather some machines support EDO RAM, provided you set the appropriate jumper on the motherboard but I opted for what I hoped was the safe option of buying some 8Mb 70ns FPM, Non-Parity SIMMS from Ebay. Early FM Towns machines are limited to 8Mb SIMM’s as a maximum. I expect that’s not the case with my FM Towns II but 10Mb sounds like plenty for the games I have in mind.

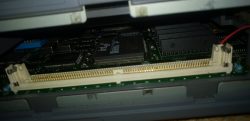
The SIMM’s themselves are cheaply available, more so if you happen to be in the USA. I understand that other FM Towns models vary with many having several slots for SIMM’s but my particular UR model just has the one slot, conveniently located at the side of the case under a plastic flap:-

IMG_20170610_152226IMG_20170610_152219

You can just see the Intex 486SX chip nestling behind the RAM slot. It seems pretty strange these days for a PC CPU to have no heatsink whatsoever but it clearly gets by without. I slotted my RAM in here and of course when I switched the PC on, it wasn’t detected. After much Googling I stumbled on a post at http://nfggames.com/forum2/index.php?topic=6150.0

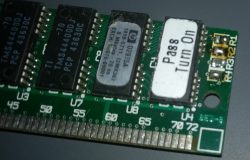
The upshot is that pins 67-70 on the SIMM chip are used to report the size and speed of the SIMM in question. The IBM compatible chips use a completely different standard to those on the FM Towns so a bit of finagling is required. Fortunately, this is fairly easy to achieve with a soldering iron even for me.

The table above (stolen from the forum post) shows the settings required with O being the pins that should be connected. Most (but not all) SIMM’s will have somewhere on them pairs of solder points for this purpose.

IMG_20170610_152131

The jumpers in question are at the top right of the chip I’ve used here. R1-R4 represent pins 67-70 in order. R3 was already bridged with a little connector. From the chart above, I also needed to connect R2 and R4. I just filled the gaps with a bit of solder and I’m pleased to report that my FM towns now detected the memory correctly on boot.

I should mention that the first chip I tried still refused to work as it didn’t pass the memory tests at startup. It may well just have been a faulty chip but I’ve heard that some SIMM’s can prove to be incompatible. The one that did work is an HP D2975A which is available on Ebay for under $3.

As far as improving Wing Commander goes, the difference is marked. During cutscenes, the extra memory appears to largely used as a cache, so the first time a given character or scene is shown it is still slow to load but once you have played a mission or two the CD isn’t even accessed most of the time. Gameplay itself is all pre-loaded before the mission and the game is so much more playable now, albeit with a really, really long loading time for that first mission. It’s still quicker than playing Wing Commander 3 on a 486 was.

I’m going to be needing that hard disk if I’m ever going to play Wing Commander 2 as it requires installation to run at all.  I have the hard disk but am still waiting on the SCSI cable to try it out. One hitch I know is coming is that the BIOS battery on this thing is long dead and it appears I will have to completely dismantle the machine to get to it. The hard disk will need setting up every time I switch the machine on if I don’t fix this but I might just live with it depending on how much grief it causes. I definitely want to get the hard disk up and running first..

The main thing that is keeping me from a Wing Commander playthrough is that I really don’t much fancy using the keyboard to play the game. The solution to that problem is being delivered next week so providing it works I hope to have this fully up and running before too much longer.

Wing Commander 1 FM Towns (First Look)

I’ve been gathering old computers a good number of years now and had managed to get near enough all of the one’s I really want with one exception. The FM Towns was a Japanese PC variant which came out in 1989. It was a 32-bit machine with 640×480 SVGA like graphics, 2Mb of RAM, 8 channel music + 6 channel PCM, built-in CD-ROM, sprite hardware and was basically years ahead of anything here in the UK where I was either still using a 48K ZX Spectrum or just getting my first 8Mhz CGA PC. The name apparently comes from the Nobel physics prize winner Charles Townes but the spelling was changed to make sure people pronounced it correctly. The FM stands for Fujitsu Micro.

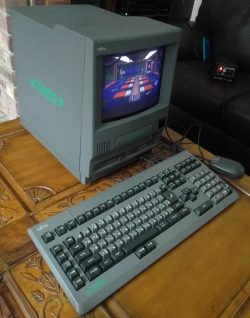
As a massive fan of DOS era PC games, the FM Towns is particularly intriguing as it got enhanced ports of many familiar titles of the era. Most famously, several Lucasarts/Lucasfilm Games adventures and the Ultima series. I’ve emulated some of these in the past but I’m far more into real hardware so I decided it was about time I spent some of that pay rise and got myself one of these:-

IMG_20170528_072618 (1)

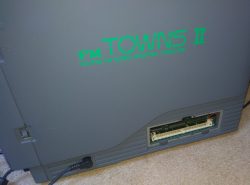
This is an FM Towns II UR which is a 486SX, with 2Mb of RAM, a pair of 3.5 inch floppies up the front and a really tiny (about 8″) but extremely sharp built-in monitor. Allegedly a few FM Towns did make their way to the UK but the only realistic way of getting one of these is to import it from Japan. They aren’t cheap and they definitely aren’t light so this is one for the real “enthusiasts” only. The power supply over there is only 100V so it needs a transformer to work in the UK. The one I’ve used on my machines from the USA is 110V (presumably deliberately in the middle of the two standards) and this seems to work fine.

IMG_20170528_072730

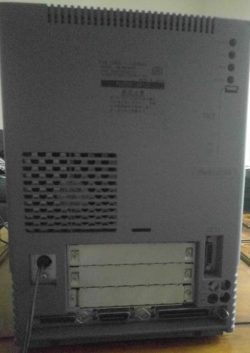
Round the back are some expansion slots, monitor in/out sockets RS & printer ports and most importantly from my point of view a SCSI port for adding an external drive. FM Towns machines didn’t usually come with a hard drive and needed to boot the operating system from a CD. With just 2Mb of RAM as standard, that doesn’t leave much room to play with and from what I’m seeing, a hard drive is a near essential extra as we’ll see shortly.

IMG_20170528_072708

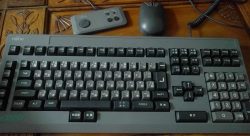
The keyboard has some interesting keys that I’m not used to including an extra 8 function keys and a ‘000’ key. I can’t say I’m a fan of having extra keys directly below the spacebar but I won’t be doing a lot of typing on this. The mouse is taken from an MSX which has compatible controllers and the gamepad is a fairly simple affair that I’ll probably ignore in favour of keyboard whenever given the opportunity.

IMG_20170528_100743

It’s high time to play a game on here and what better to start with than Wing Commander. The FM Towns release comes with some fancy new artwork for the cover and features CD audio, cockpit speech (in Japanese) and digitised sound effects throughout. On starting it up, however I was greeted with stony silence which was something of a let down. From reading through the installation sheet that comes with the game I gather that on 2Mb machines that are running the game from CD, it defaults to no audio to stop the gameplay getting interrupted. It is possible to switch them back on by pressing ‘M’ for music once you start the game. The sound can’t be turned on until you are in the cockpit with ‘S’ to turn on speech and ‘Ctrl + S’ to turn on the sound effects. The reason for these being off is readily apparent as the game constantly loads off the CD and the music and gameplay grind to a halt every time it does it. I recorded a quick and dirty video playing through the first mission below which will give you an idea of what this runs like on a stock FM Towns. Expect a whole lot of loading from that single speed CD drive:-

The music and sound effects are fantastic. I especially like the crescendo at the end of the briefing but the effect is slightly ruined when the next scene has to load. From what I’m seeing, this could well be the best version of WC1 but the loading times and constant pauses are jarring to say the least. It clearly needs that hard disk so I’ve ordered a cheap refurbished 2Gb IBM laptop hard disk + a 50-68 pin SCSI cable off Ebay. I’m hoping that I can more or less just plug that in and be good to go but I can’t profess to knowing anything at all about SCSI drives or installing them in obscure Japanese computers. I’m also looking into memory expansion. The Towns uses a standard 72pin SIMM (non parity, non EDO) so if I chuck in an 8Mb chip it should in theory greatly reduce the need to load data all the time.

Much like the Turbo button on old PC’s, the Towns has two modes with the slower being compatible with the original machine (386SX). I did try running Wing Commander in fast mode (hold down T at boot) but it clearly ran too quickly and slow mode is the way to go. Other games I’ve tried like Ultima Underworld and Alone in the Dark benefit greatly from the extra speed of fast mode. Alone in the Dark actually caches screens to floppy disk when playing the intro in order to not stop the CD music. When you are using a floppy drive as virtual memory, I think it’s a clear sign that you need a hard disk.

The Ultima games on the other hand are much less demanding and run fine without the hard disk, even the famous Ultima 6 talkie version. Underworld I would have benefitted but didn’t run too badly. Underworld II actually requires a hard disk to run at all although it doesn’t appear to mention this on the outside on the box, only when you read the setup instructions. I’ll play through some of these properly when I get the chance.

For now, and pretty much as ever when buying an old machine like this, I need to throw a bit more money at it. Compared to the IIGS which was a serious money pit, I may have got off lightly this time. I’ll wait for all the bits to arrive and then see if I can take a proper look at Wing Commander.