All my recent posts have been dealing with getting an FM Towns II computer in a suitable state to play Wing Commander. In the last of these I took a quick look at the analog controller I’ll be using and prior to that managed to upgrade the RAM from 2 to 10Mb. This time I’m dealing with the matter of getting a hard disk drive up and running.
Near enough all FM Towns computers include a SCSI interface for connecting up external SCSI drives and mine is no different having a SCSI-1 50 pin centronics connector on the back for this purpose. SCSI connectors have come in many shapes and sizes over the years but there are cables to convert between these and in theory it’s all backwards compatible. As such, my first thought was to find the cheapest SCSI hard drive I could with an appropriate cable to connect it up and go from there. With that in mind I bought this:-
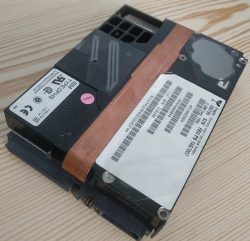
This is a 2Gb IBM drive pulled from a laptop. It’s a SCSI-3 device with a 68 pin half pitch connection on the back. I found plenty of manuals on the web and tried various jumper settings on the hard drive (of which it has many) but was unable to get anywhere at all with it. Initially I was trying to set the drive up using a Towns 2.1 OS boot disk that came with the machine but found another guide on hard disk installation at http://illusioncity.net/guidefm-towns-how-to-create-and-format-an-hd-image-and-install-dos-with-cd-support/ .
The snag with this guide is that I needed to create a DOS boot disk and the Towns doesn’t even use a standard 1.44Mb format. I’ve managed to source a complete download of near enough everything released for the FM Towns (not one I can share unfortunately) which included the DOS disk images. To write a disk I had to connect up a 3.5 inch floppy drive to my modern PC and used a program called Omniflop. 1.44Mb floppies appear to work fine for this purpose. Omniflop is an old program but works perfectly in Windows 10 at least at the time of writing. It’s a simple enough process – just follow the instructions at http://fullmotionvideo.free.fr/phpBB3/viewtopic.php?f=5&t=1187.
The working boot disk didn’t actually help out as I still couldn’t detect the hard disk from the setup program. I clearly needed another plan so searched the web and came across the SCSI2SD device. This is one of those fantastic modern gadgets that makes retro computing so much less grief than it would have been a few years back. It emulates up to 4 SCSI devices at once including hard drives, CD-ROM and floppies, storing all the data on a swappable micro sd card. I ordered mine from Amigakit where it’s currently listed as SCSI to Micro SD Interface Adapter. I was slightly wary about this as there is a long list of supported devices on the Wiki which doesn’t include the FM Towns but it seemed the best shot.
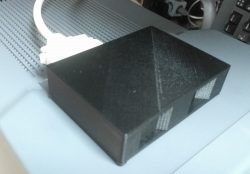
I also ordered a case for the device from Ebay. These are 3D printed and include the cabling on the inside to connect to the board. This one has a 50 pin half pitch connector on the back. I can’t honestly say I’m too impressed with the quality of the case but it does the job. Just don’t expect to be able to get the SD card out without tweezers. You don’t want to take this thing apart too much either as the screws had barely any purchase on the first assembly.
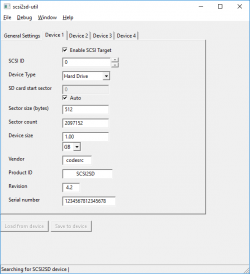
Setting up the SCSI2SD is a matter of sticking in an SD card, connecting it to your PC with a USB cable, running the utility software and selecting a drive size. I set up a 1Gb drive but found out afterwards that Towns DOS won’t take partitions over 127Mb. You can set up multiple partitions on one large drive if you wish and there are different file table formats that you may be able to use if you know what you are doing. I stuck with MS-DOS since I know it will work.
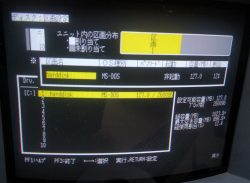
There is no fdisk to partition hard drives on the towns and the system has a more all-encompassing setup program instead. The illusioncity guide linked above details what you need to do, although you can do the same job in Towns OS 2.1 by the looks of it. I’m glad to say that the Towns detected the SCSI2SD without any problems whatsoever and I was soon up and running. The power is drawn directly from the SCSI connection so there is no need for any power source other than the Towns itself.
That just leaves the matter of actually installing Wing Commander. I would like to think there would have been an installation program but the extra instruction sheet bundled in with the game says to manually copy all the files to your hard disk from the CD. This proved more tricky than it sounds since I’m dealing with an unfamiliar operating system in a foreign language. My first thought was to use DOS since the commands are the same. This appeared to be going OK until I noticed how just many different subdirectories I was going to have to copy one by one (there is no xcopy command on my DOS disk).
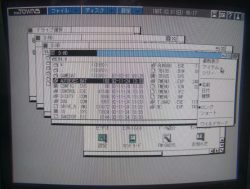
I swapped to Towns OS at this point. The file browser on this defaults to just showing some icons to run programs rather than the actual file structure. After randomly trying options, I realised that you can swap to showing the files by clicking the double folder icon at the top right of the window and selecting the second option down. After this point it’s a case of drag and drop. Wing Commander can then be started by running wc.exp and apparently defaults to English which is just as well.
It’s been a longer journey than I anticipated getting to this point but I’m there at last. I highly recommend Google Translate for anyone messing around with one of these machines that doesn’t have much Japanese. My phone struggles at times to pick up the screen clearly but it’s meant I’ve been able to decipher the menus in Towns OS and work out all the basics.
I do still have to set up the hard disk every time I start the machine since I need to replace the BIOS battery. This would be no small task in one of these things and would mean complete disassembly of the machine and probably soldering the new battery in place. I’ll leave that job for another time (if ever). For now, it’s about time I played some Wing Commander.

